


Depending on the type of your contract, you can have one or two different ways of inviting applicants to take your interview.
- If you want to invite a known set of applicants, or have a large number of applicants to invite, use the CSV upload option.
- If you want to share a link on social media or in a recruiting event, use the URL link option.
Invite applicants by uploading a CSV file
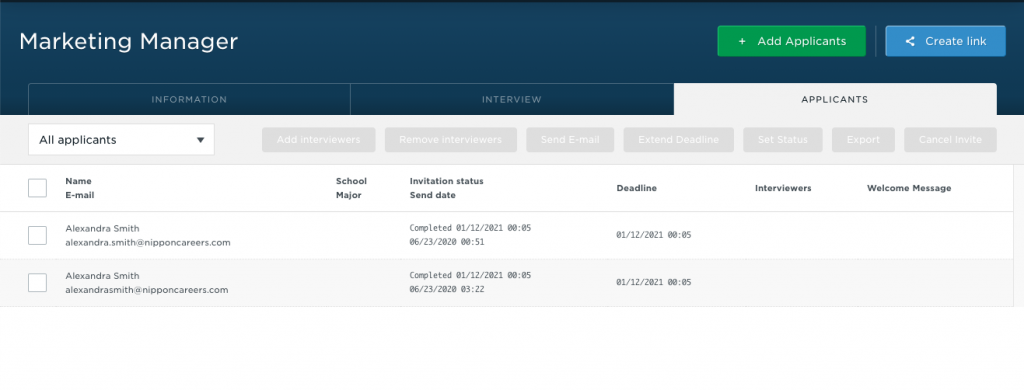
Click on the “Add applicants” button on the top right to start the invite process.
In the first screen, you will upload the file itself. It can be in UTF-8 or SHIFT-JIS format. If the file is not recognised, you will see an error.
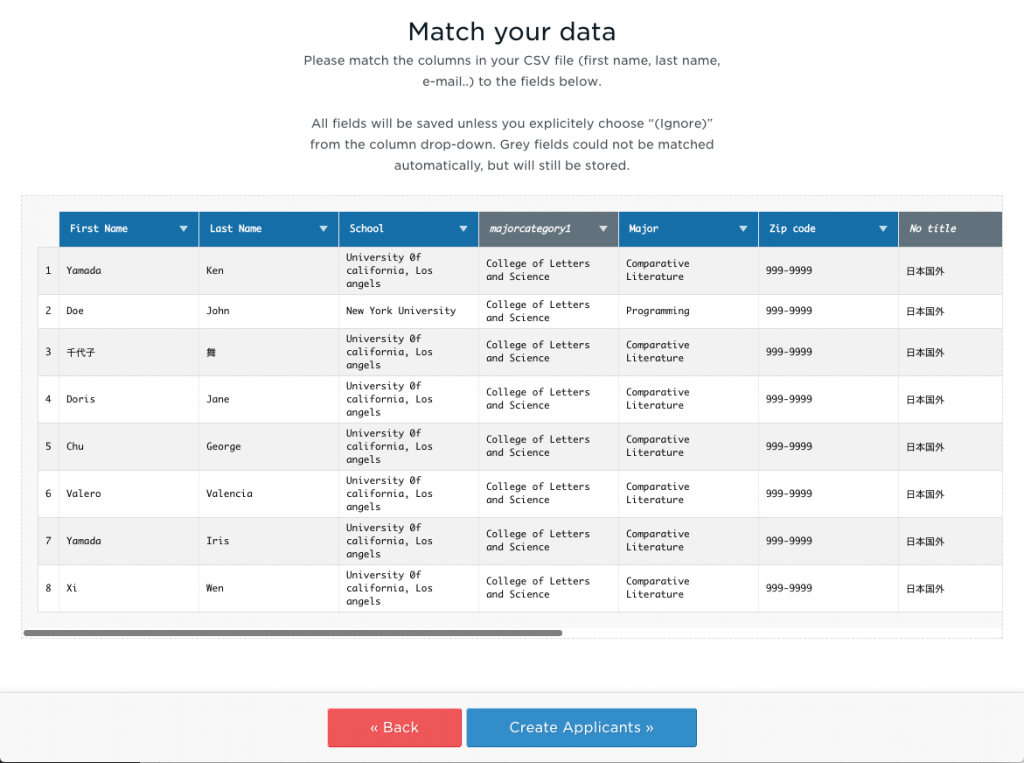
Associate your data
In the next screen, you will associate fields in the CSV file to applicant data. Most fields will be detected automatically (first name, last name, email, job title, etc.), but you may be required to set some manually if they aren’t.
The required fields are:
- First name
- Last name
- E-mail address
All of the fields in the CSV file will be stored in the applicant database.
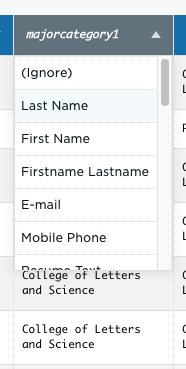
To pick a data type for a column, click on the drop down that functions as the name of the column. If a data type was not detected, the name will be whatever was used in the CSV file itself.
Once you associate a field with a data type, the column name will turn blue. If it is grey, it is unassociated and will be stored under the applicant’s profile as additional details that cannot be searched for using applicant search. If a data type was automatically detected, the column will be blue automatically.
With most CSV files, all the necessary data types are detected automatically, so you can just press “Create applicants” to continue. Clicking on the button will process and create records of the applicants to send invites to once you’re done, so it can take a few moments depending on the size of your list.
If your list is over 10,000 applicants in length, please split it to several CSV files to ensure smooth processing.
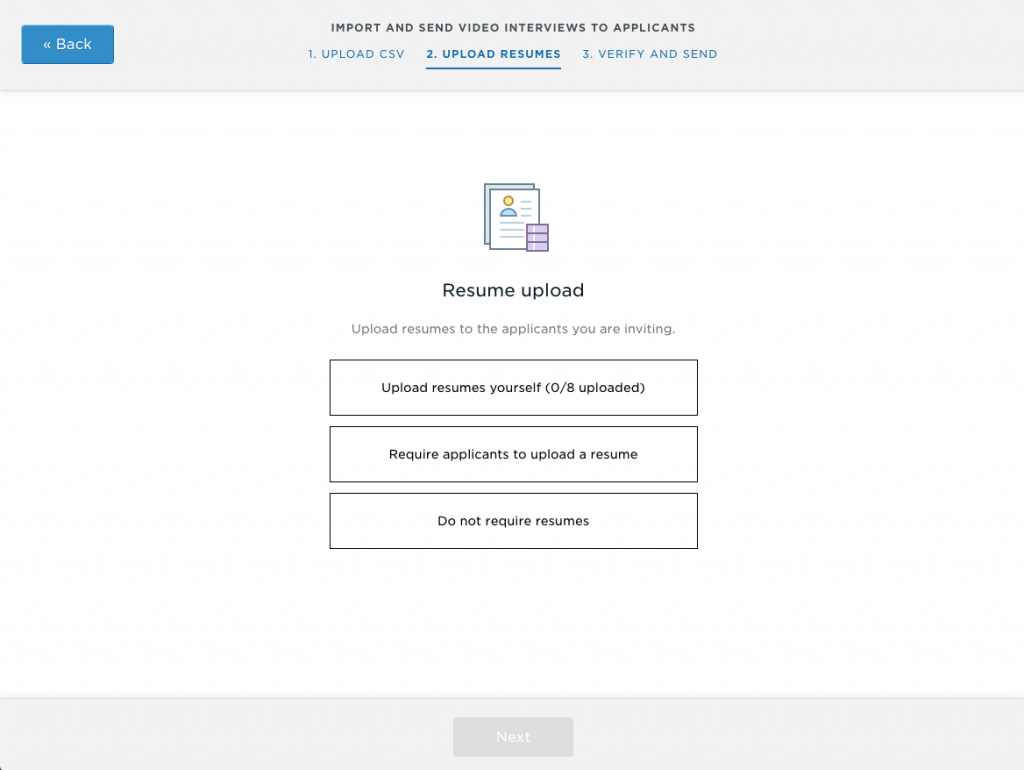
Resumes
The next screen offers you a choice to have you upload a resume separately for each applicant during this invite process, have applicants upload a resume themselves, or don’t require resumes at all.
The resume/CV will be displayed next to the applicant’s video interview in their profile once their interview is completed, so this step is recommended to leave on requiring applicants to upload their resume unless you already have the resumes yourself.
You can also upload resumes later on in the applicants’ profiles.
To continue, click on “Next” on the bottom of the screen.
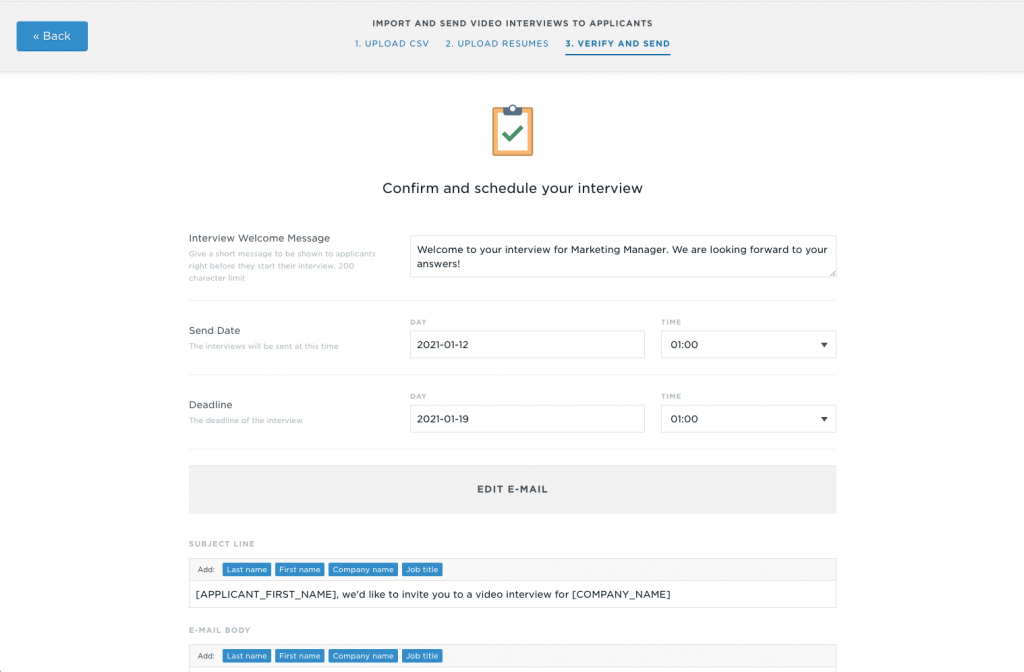
Confirm and schedule your interview
The last step is to confirm the details of your interview and list of applicants before invites are scheduled to send out.
Interview welcome message
This is the welcome message that will be displayed to the applicants before their interview begins. If you have set a default welcome message, you can edit it here for the batch of applicants that you are inviting with this CSV file.
Send date
This is the date and time when the system will begin sending invites to the applicants. To schedule invites in the future, just pick a date and time when you want the invites to be sent.
Note that if you have a large number of applicants, the e-mails are sent out in batches of 500 every ~15-30 seconds by our e-mail provider. It can therefore take some time before all of them are sent to applicants’ inboxes.
Deadline
This is the date and time by which the applicants must complete their interview. If you have set a default number of days to complete in the video interview details, the date will be calculated from the send date you set.
We recommend a deadline of 7 days for most interviews. Less than that, and you will not have many people complete the interview. More than that, and people are more likely to forget about the interview.
Edit e-mail
Here you can edit the e-mail template that will be sent out to the applicants. If you have edited the default template in your interview settings, it will be displayed here. Editing this template will not change the default e-mail template, but will be used for the applicants in this CSV batch.

Add interviewers
You can add or remove interviewers for this CSV batch in this section. Type in your coworkers’ name or e-mail address to select them from the drop-down list, and they will be added to the list of interviewers. To set someone as a default interviewer, click the checkbox above their name.
To remove an interviewer, hover over their card and click the red “X”.
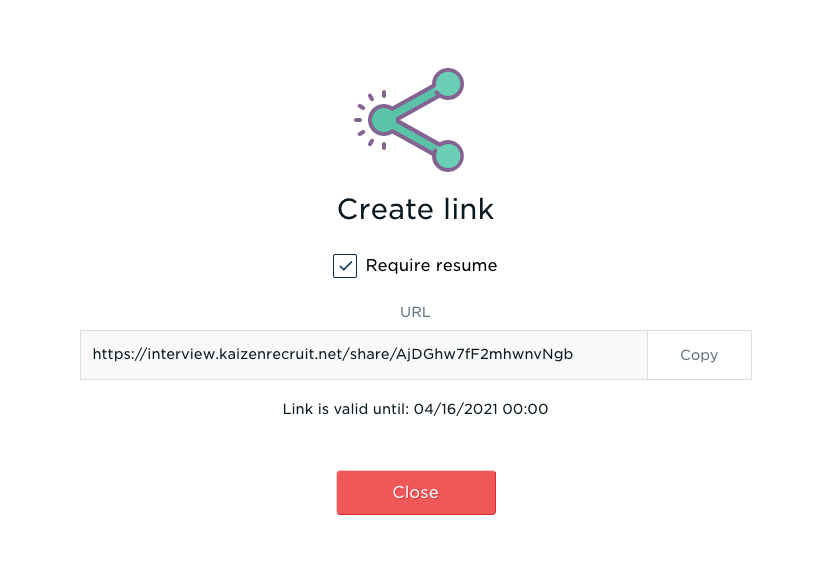
Create an URL link
You can create an URL link to share to applicants, on social media, or in recruiting events, where the applicants will sign up to the interview themselves. You will receive completed interviews as long as the interview period is active.
To create an URL, click on the “Create link” button on the top right. A link will be instantly generated, and you can click on the “Copy” button to copy it to your clipboard.
To require applicants to upload a resume/CV, check the “Require resume” option. It is enabled by default. The applicants will then upload their resume/CV after their interview is complete in DOC or PDF form.
E-mail template, deadline and interviewers when inviting via URL link
When you use the URL link option, the default settings you have defined in the interview settings will be used.
For example, if your “Days to complete” is set to 7 days, every applicant that signs up for an interview will have 7 days to complete their interview.
For interviewers, any default interviewers you have set will be used.